General Settings
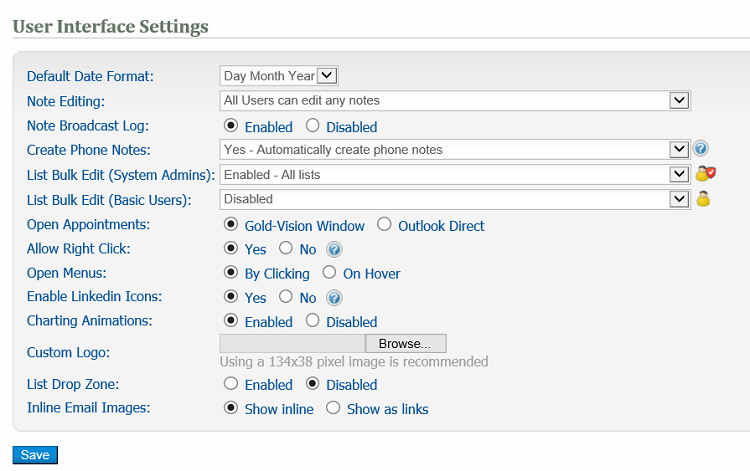
Note editing - choose from five options:
- Disabled - Notes cannot be edited
- Enabled 24 Hours - creator can edit for 24 hours
- Enabled Always - creator can edit
- Administrators can edit any notes
- All Users can edit any notes
Create Phone Notes - determines whether a note window is opened when the phone icon is clicked
List Bulk Edit - access to the Replace function in a list. This allows users to update items in bulk. Select whether this is available for normal users or system admins and which lists can be edited.
Open menus - Either By Clicking or On Hover.
Charting Animations - enable or disable the load behaviour of charts.
Custom Logo - add your Company logo to Gold-Vision with the recommended image size - 134x38 pixels.
List Drop Zone - enable or disable the ability to drag an drop an item to the list drop zone - this is a Google Mapping feature.
Inline Email Images - determines how images in emails are displayed when viewed.
List Design
The List Design lets you change the fields available in lists and update how they are displayed and sorted.
To open the list design screen select User Interface then List Design from the menu, then select the Gold-Vision list you want to change.
The screenshot below shows an example of a configuration screen for Accounts.
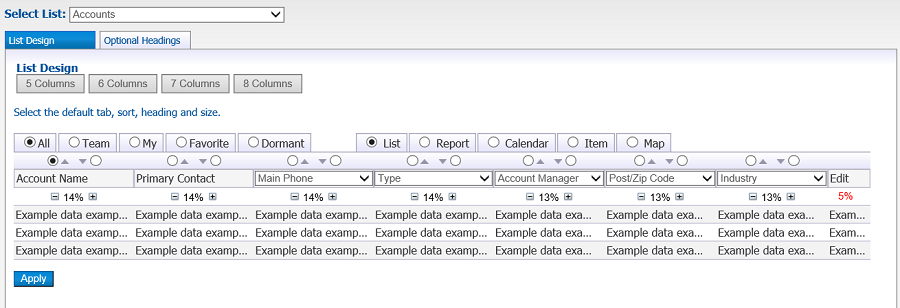
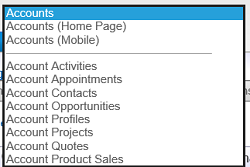
Select List: There may be more than once list for the area so choose which one you want to edit. The options here are the main list (e.g. Accounts), the Home Page list (as seen when a user has this list on their homepage) and Mobile (the list as seen on Gold-Vision Mobile).
List Design
Default Columns: Select the number of columns you want to see in the list (5-8 are available on most lists). You can then select the default columns to be displayed when you open this list. The selection can be from any of the fields currently available in the Displayed list.
Default Sort Order: Define the default sort order for the list and the direction to sort. The list can be sorted by a field not selected as one of the default columns if required.
Default List: Select the default list to display, from either All, Team, My, Favorites or Dormant (the latter only for Accounts and Contacts). And List, Report, Calendar, Item or Map (available with Google Mapping add on)
Column Widths: Click on the - or + buttons to increase or decrease the relative widths of the columns on this list.
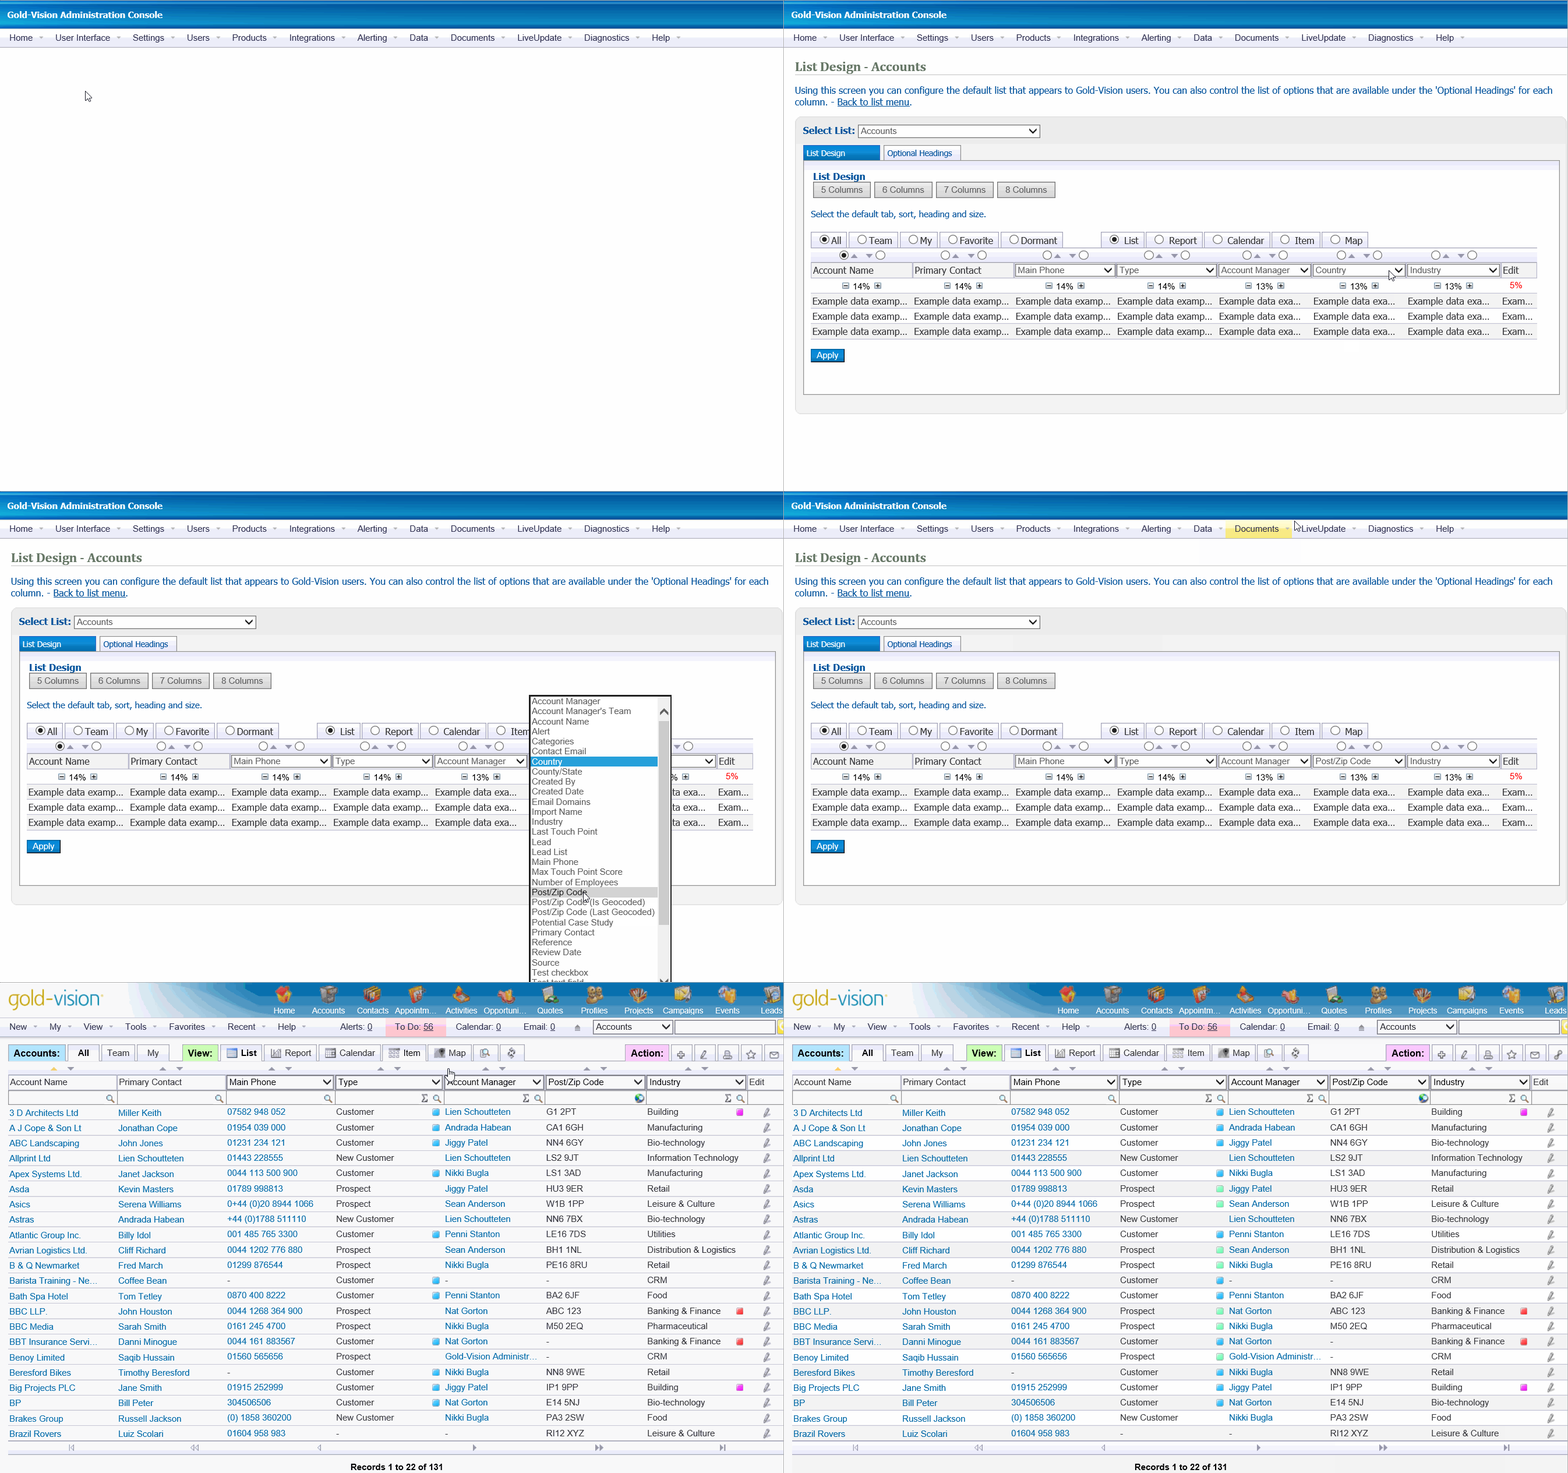
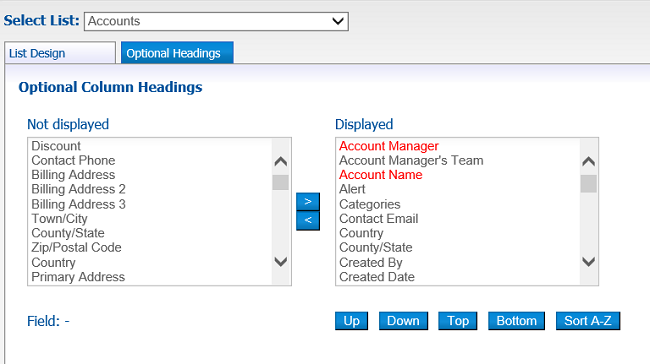
Below shows changing the default column heading in the accounts list from Country to Post Code:
Optional Column Headings: This is made up of two lists - Displayed and Not Displayed.
The items highlighted in red are included in the default list view (and cannot be moved from Displayed to Not Displayed).
Update the items between the Not displayed and Displayed lists by selecting an item and clicking either the Add or Remove buttons. The item will move across to the other list.
In the Displayed list, items can be arranged to appear in a specific order, simply click on an item and click Up or Down as required. Alternatively you can use Top/Bottom or Sort A-Z.
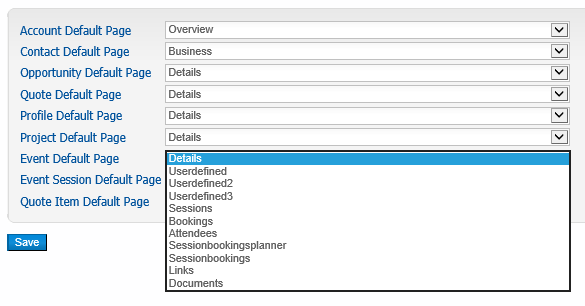
Page Defaults
Using this screen you can choose which page is displayed by default when a Gold-Vision item is opened.
Select from the dropdown list and click Save to apply.
Validation
Choose options for validation checking - this is to help identify potential duplicates.
Insert -will check when new item created.
Update - will check every time the record is edited and saved.

When an Account/Contact is saved with a potential duplicate, a message will alert the user who can then decide whether or not to proceed.
Reference Numbers
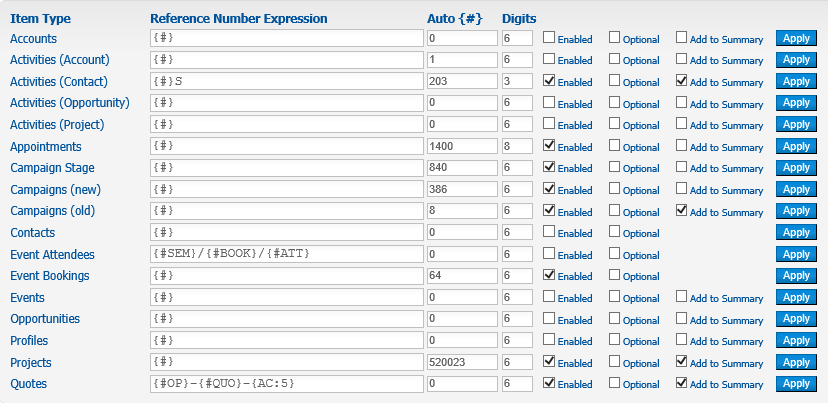
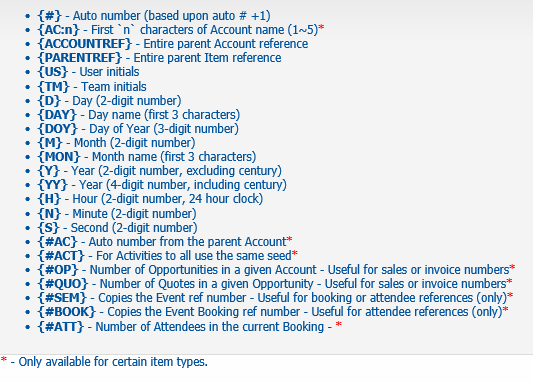
Gold-Vision items can be given automatic reference numbers when they are created. Each item type supports an 'expression', made up of tags, letters and numbers as required.
This table describes the expressions and how to use them.
For example:

In this example the quote will have the following reference number:


Add to summary - the reference number is added to the name of the item (at the beginning). This can be useful as the reference will be included in the subject line of emails (when clicking the email icon) and using Alerting this email can also be automatically linked to the Quote.

Categories
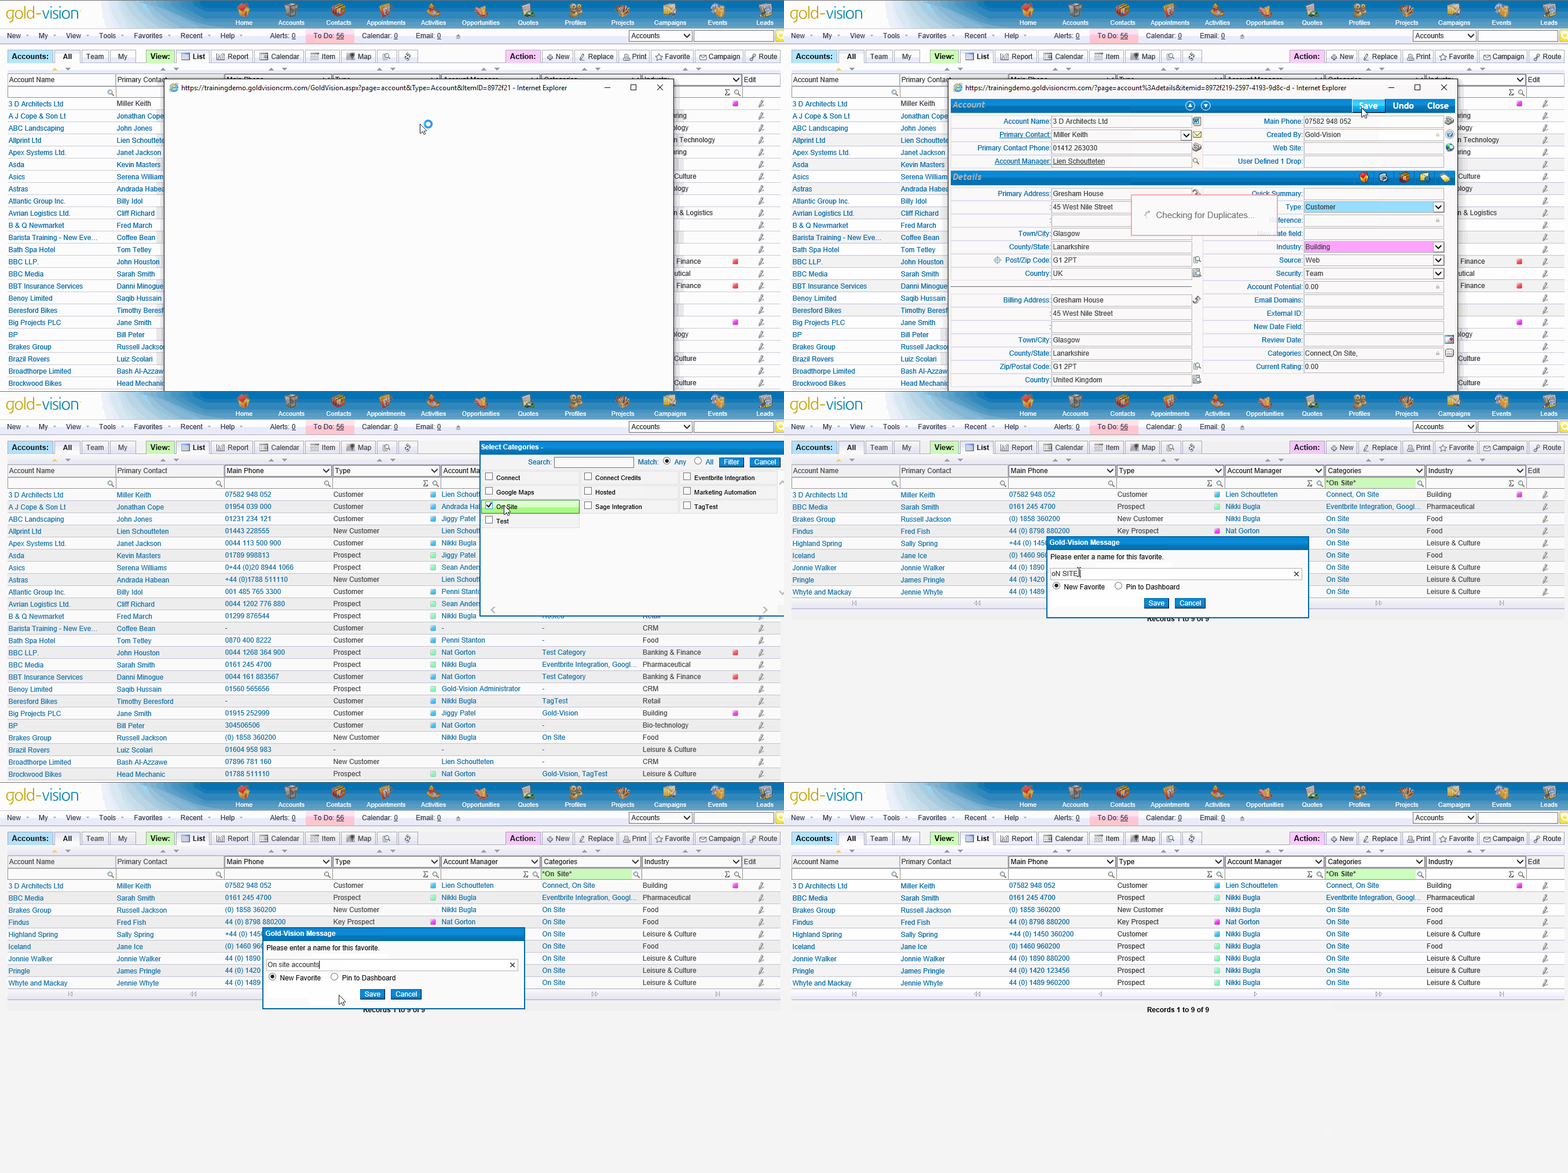
Use Categories to identify records by a common set of words or phrases (where more than one may be relevant).
Categories are useful for filtering and searching and can also be used for reporting and for inclusion in Campaigns. They can also synchronise with Outlook Categories that match the Gold-Vision Categories. This allows field based users, for example, to write notes and categorise their off-line Outlook appointment records for synchronisation back into Gold-Vision for reporting.
A list of Categories is shown below along with the Gold-Vision items that they can be applied to. Please note that the 'Propagate' option will automatically apply the Category to all parent items (up to the Account) when it is added to an item. Toggling the 'Propagate' or other options will not affect existing applied Categories.

Adding a Category: Type a new category description into the category add field. Click on the Add button. The category will appear in the category list below.
To add the category to all item areas, click on the + icon to the left of the item columns.
To remove the category from all item areas, click on the - icon to the left of the item columns.
To add all categories to individual item areas, click on the + icon in the item columns.
To remove all categories to individual item areas, click on the - icon in the item columns.
To add or remove the category to individual item areas, click on the relevant checkboxes.
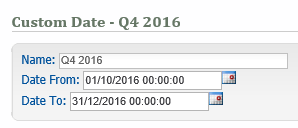
Custom Date Periods
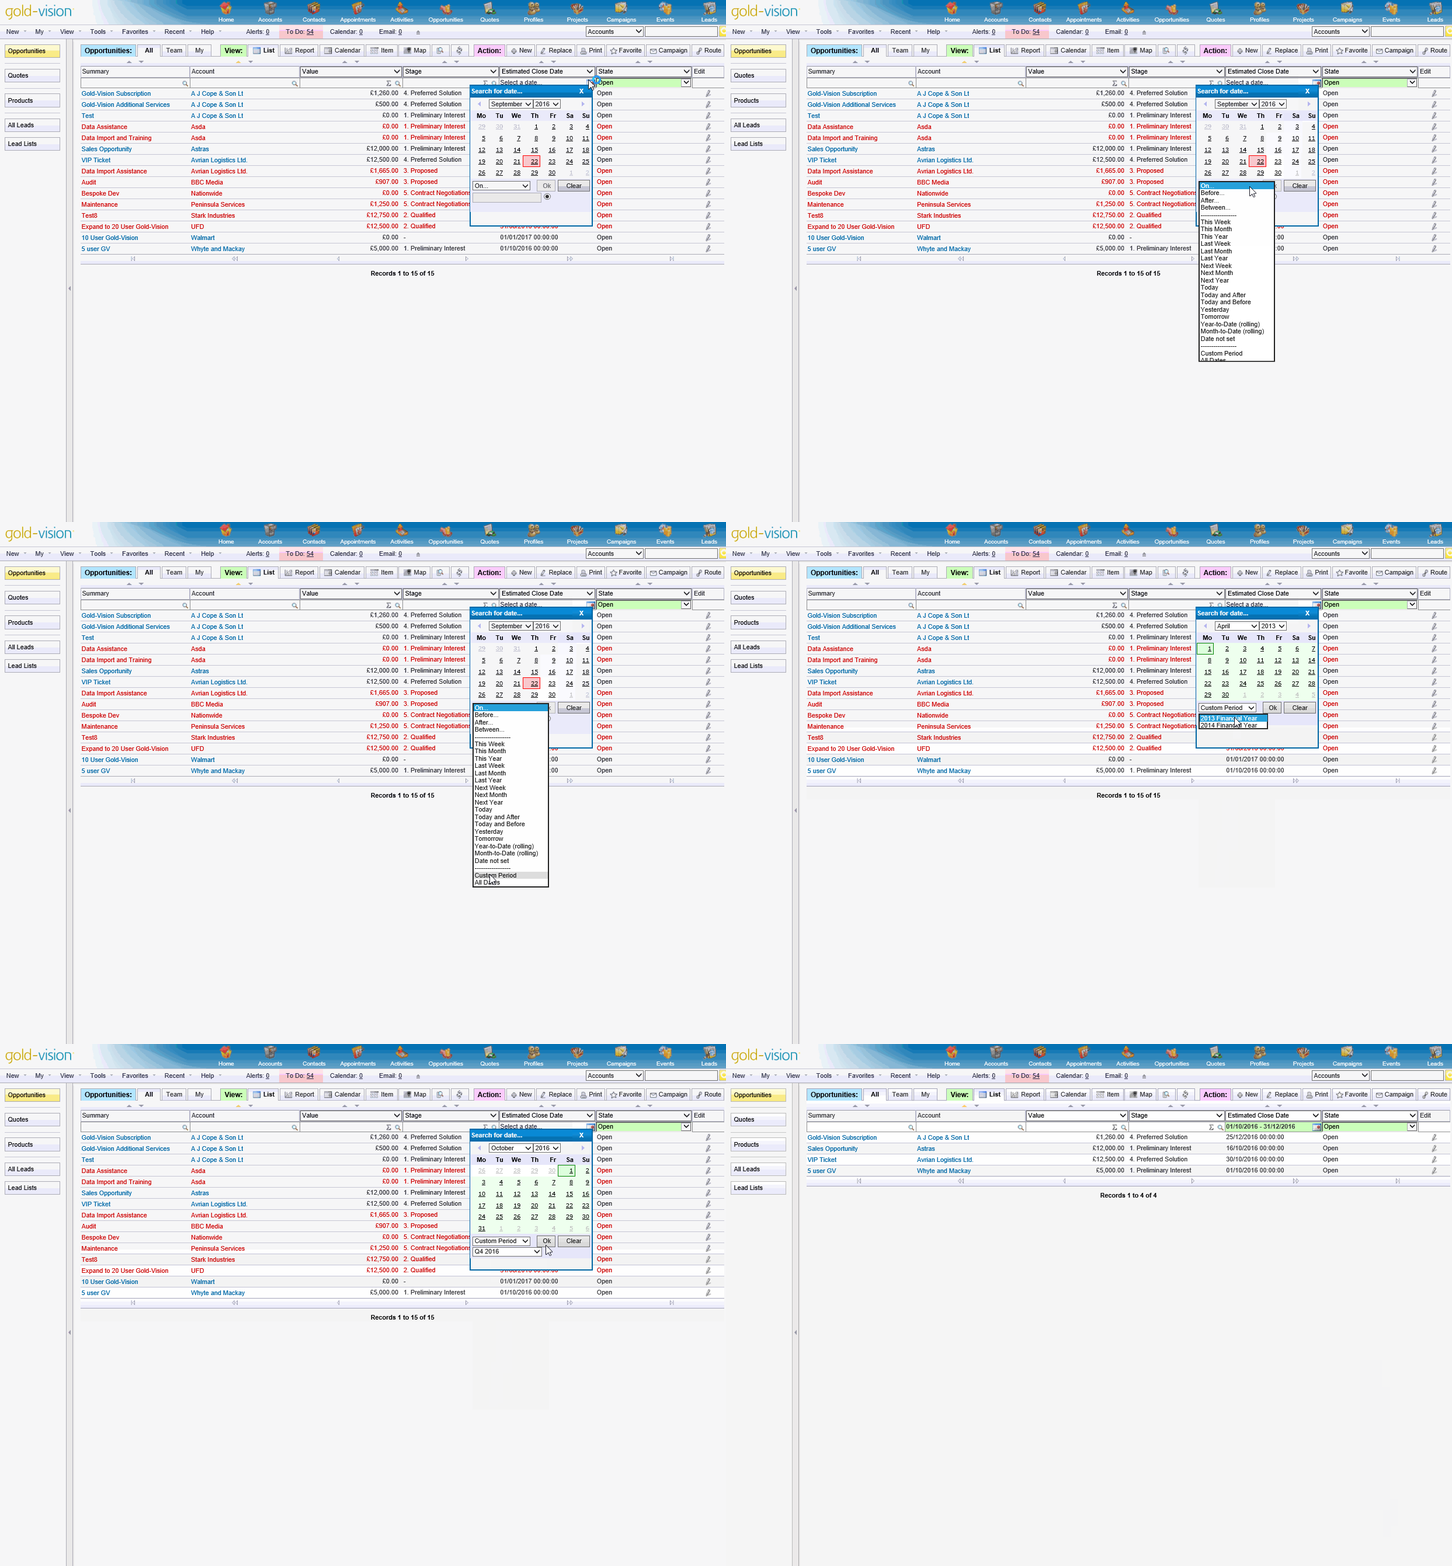
Set Custom Date Periods to match those used by your business - for example - Financial Year or Sales Quarters. They will then be available to users when the calendar icon is selected on a date field.
Global Label Update
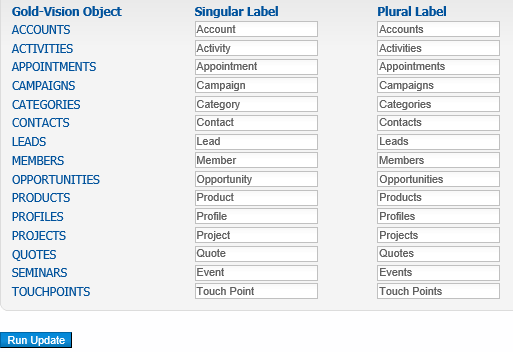
Global Label Update lets you rename the main Gold-Vision items to suit your business terminology.
Each change that has been made using the other options in the User Interface menu is stored. This stored dictionary of configuration can be re-applied at any point. This is typically performed after system upgrades or moves to update the default system layout.
Running the Global Label Update will update the last known label configurations that were recorded and overwrite any existing labels whether they are the same or not. This will also update the layout of screens.
Make any required changes to the global item names in the Singular Label and Plural Label boxes. To begin the global renaming process, click the Run Update button.
Important note: Global renaming is a significant procedure, which will reset and rename a large proportion of screen names and labels throughout the entire product. For this reason it is recommended that global renaming is performed during the early stages of implementation and not on an ad-hoc basis.


