Back to top
Accounts & Contacts
Appointments
Links
Email Tracking
Notes
Activities
Profiles
Documents & Templates
Back to home

Core Gold-Vision

Navigating

Icons and Menus
Lists
Searching
Favorites
Tips


Accounts & Contacts

Creating and Using Records
Reassigning Contacts
Categories
Post Code Look Up
 

Appointments

Creating and Managing Appointments in Gold-Vision
 

Links

Gold-Vision allows you to create links for any Gold-Vision items and then define the relationships from both sides.


Email Tracking

Sending and Viewing Emails
Private Emails
Outlook Add-in


Notes

Creating & Broadcasting Notes
Sticky Notes
Viewing Notes
 

Activities

Creating and Using Activities

Profiles

Creating and Using Profiles
 

Documents & Templates

One click to create Word templates from any Gold-Vision record


Webinars   Web clips   guides   

Accounts and Contacts

Creating an Account

 
The Accounts section is the central point for managing all account information in Gold-Vision.
In effect the Account is the “parent” item from which other “child” items can then be created such as Activities, Contacts and Appointments.

Accounts may be your customers, prospects, partners, suppliers, distributors or end customers. Accounts may be linked, and so for more complex organisations, an Account may represent a branch or department - sometimes with a different physical address.

Creating a New Account

gif1

From within your new Account record you can set-up different areas, these include:

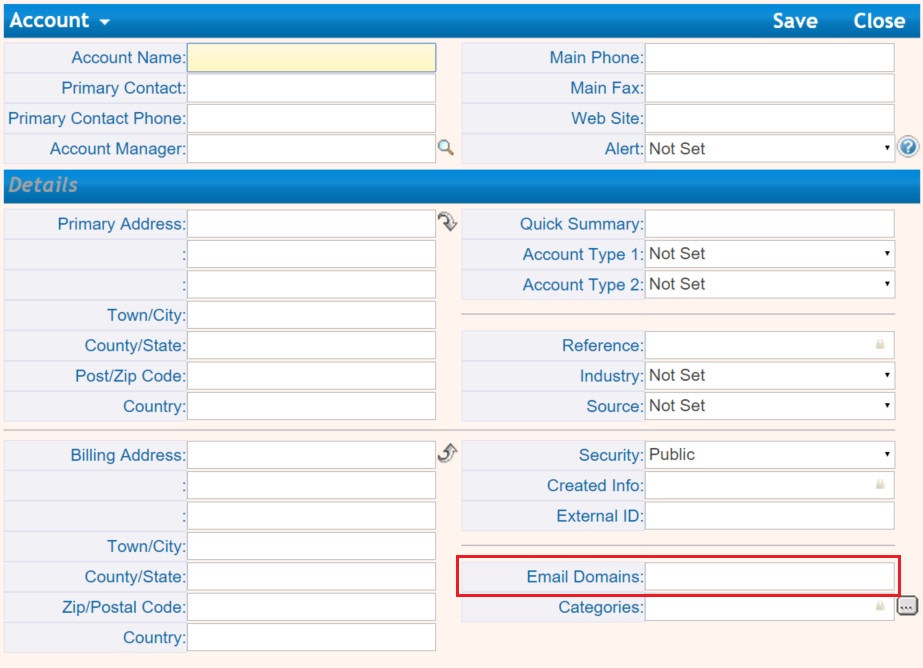
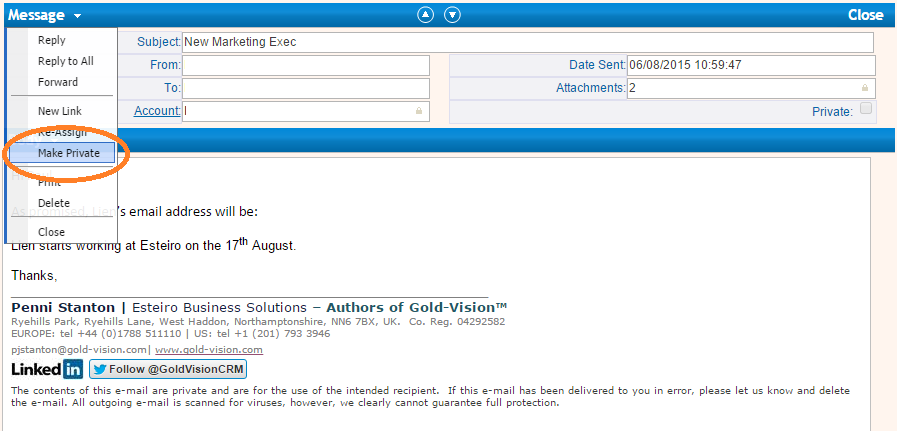
Three Security Levels to choose from for your new Account:
Public – all users have access.
Team – the Account Manager, other team members, the assigned manager, executives and/or administer groups have access.
Private – can only be accessed by the selected Account Manager and Gold-Vision Administrators.

Email Domains: Enter email domain(s) for the Account, e.g. gold-vision.com (after the ‘@’ symbol).
Any email containing this email domain will then be automatically tracked even if a contact email has not been entered into Gold-Vision

Mandatory Fields: Fields highlighted in red are mandatory fields and have to be completed before a new record can be saved. Mandatory fields can be applied to any field in any record by a Gold-Vision Administrator.

Validation Checks

When saving a new Account, Gold-Vision will complete a Validation Check for any duplicate records based on validation settings and will warn the user if a duplicate occurs.

Completing the Primary Contact Record

If the Primary Contact field has been filled on clicking Save, you will be prompted to add further details to the primary contact record. You have the choice to complete further details for the Contact record or dismiss this prompt.

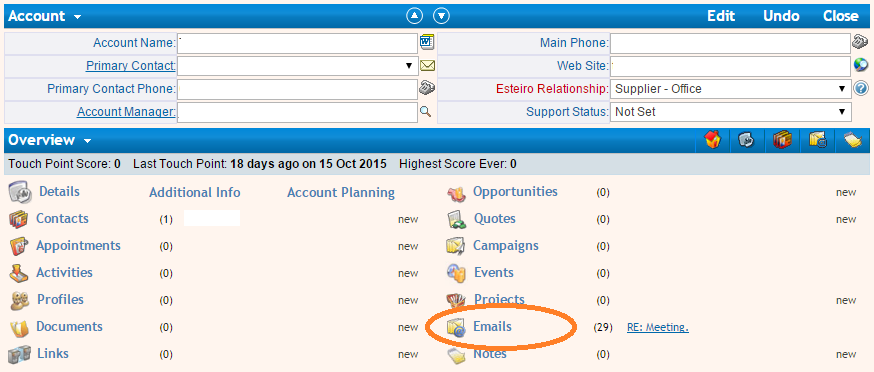
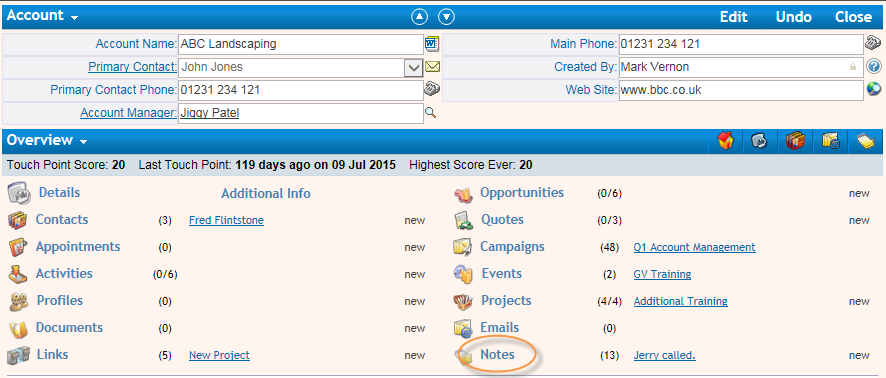
Using Account Records

From the Account Overview screen you can:

Edit the information to input updated data such as new address/ contact details.

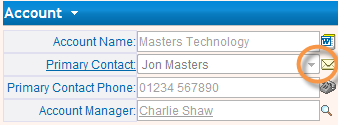
The Primary Contact for the Account can also be amended using edit from this screen.
*Click on Primary Contact to open Contact page.

Use pre-designed templates to send or email a letter to the Account with pre-defined company details completed.

Email the Primary Contact or Account Manager.

Initiate a telephone connection and note record for Primary Contact or Account via selected user phone setting.

Open the Account’s website.

Click on the Account button to use the Account Function Menu to create new items such as Contacts, Activities, Opportunities, Projects etc.

gif2

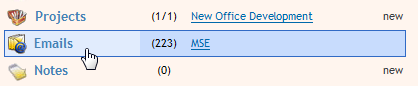
Use the Account Navigation Menu to access different Gold-Vision items:

gif_accountscreen2

Creating Contacts

A Contact record holds information on the people associated with an Account. When a Contact is created from an Account that Contact then belongs to the Account it was created from.

Open the Account that you would like the Contact to be associated with:

gif_createcontact

Using Contact Records

From the Contact screen you can use pre-designed Word/html document templates to send or email a letter to the Contact with pre-defined company details completed.

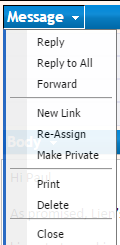
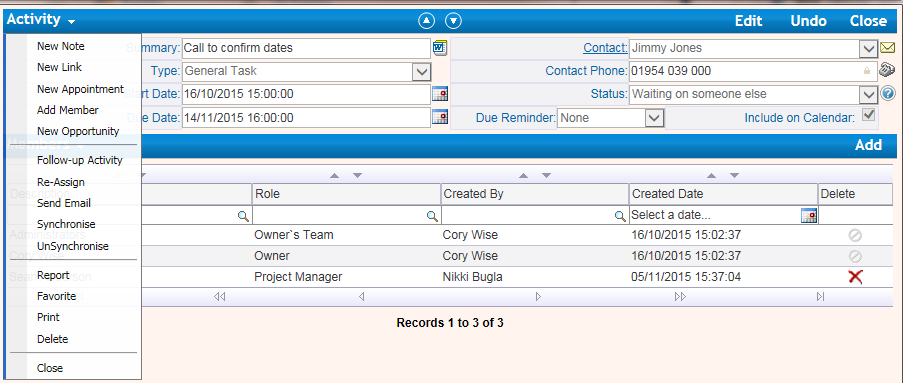
By clicking Contact button (within the Contact record) you will open a drop-down menu which will allow you do the following:

- Initiate a telephone connection and note record for Primary Contact or Account via selected user phone setting.

- New Link: May be created to link the Contact to another Gold-Vision item.

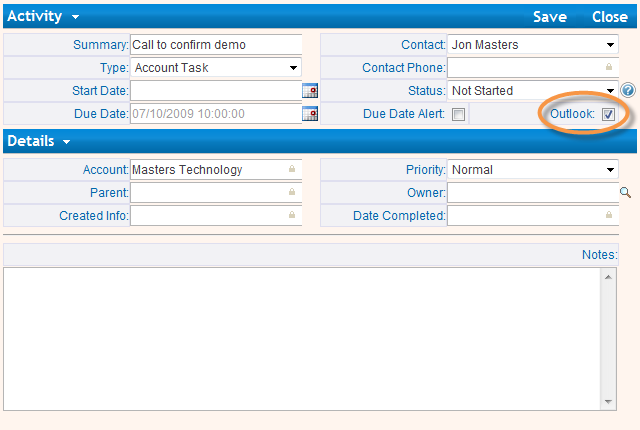
- Synchronise/UnSynchronise: Contacts may be synchronised or unsynchronised to your local Outlook® using this menu.

- Re-assign a Contact to a different Account if they move.

- Import Tasks: Outlook® Tasks may be imported as Contact Activities assigned to this Contact.

- Add this Contact to your Favorite List: it will then be automatically displayed on your personal favorites list.

- Make Dormant: a Contact can be set to Dormant. It will then be viewable under the Dormant Contacts View and not under the normal.

- Contacts Listing. Simply opening a Dormant Contact will automatically re-set it to a live status if required.

You can also access information surrounding:

Campaigns: Record of Campaign Runs that have included the Contact as a Recipient. Provides date of run, campaign medium used and a link to main Campaign Record.

Seminars/Events: Record of Seminars/ Events that the Contact been booked on to.

Emails that have been tracked to and from Contacts can be viewed from within a Contact. To manually add an email to a Contact highlight the required email in your Outlook Folder and Click ADD.

Adding a Member to a Gold-Vision Item

For any item you have the option to create a Team and allocate roles for your team members. You can view members and their team roles from the Navigation menu:

Exporting Gold-Vision Contacts into your Outlook Contacts List

Filter a list of Gold-Vision contacts accordingly. Users can filter on business contacts within Gold-Vision which they would like to be kept offline e.g. ‘My Contacts’ or ‘Customer’s etc. Click the Outlook icon from the Action tabs:

outlookexport

Select an appropriate folder in your Outlook client contacts folder.

Click Go, this will copy the selected Contact(s) to the allocated folder in your Microsoft Outlook.
! Note: Mass exports can affect the performance of Microsoft Outlook.

Re-assigning a Contact

A contact can be re-assigned to a new parent account. This scenario usually occurs when an individual has left an organisation, alternatively this process can be used if the contact is against the wrong parent account. To do this open the Contact record that you would like to reassign, select Re-assign and you have two options:

Option 1
Select an Account that already exists on your Gold-Vision system that you would like the Contact to be Re-assigned to – by entering the Account name or by scrolling through the Account list.


Option 2
Click New to create a New Account that you would like to the Contact to be Re-assigned to – when you save the New Account Record the Contact will then be Re-assigned.


The Contact Record will now be updated to show the Account that the Contact is assigned to.
Email and Activity records for the Contact will remain with the Contact Record following Account reassign.
Click Edit to change any details, such as address, email, telephone, click Save to update changes.


GIF_REASSIGN


Set an Account or Contact Record to Dormant

An Account or Contact can be set to Dormant. For example, from the Account Function Menu:

dormant

Dormant Accounts or Contacts can be viewed from the main menu. Simply go to View > Contacts/Accounts > Dormant. Opening a dormant Account or Contact will re-set it to a live status if required.

! Setting an Account to Dormant will automatically set the Contacts to Dormant.

Updating Contact Addresses

If you update the primary Account address you may also need to update the addresses of one or more Contacts under the Account. An automatic prompt will appear whenever you update an Account address.


Follow the prompt and you can select whether to update the address, phone number and fax number. If you do not want to update the information uncheck the box.
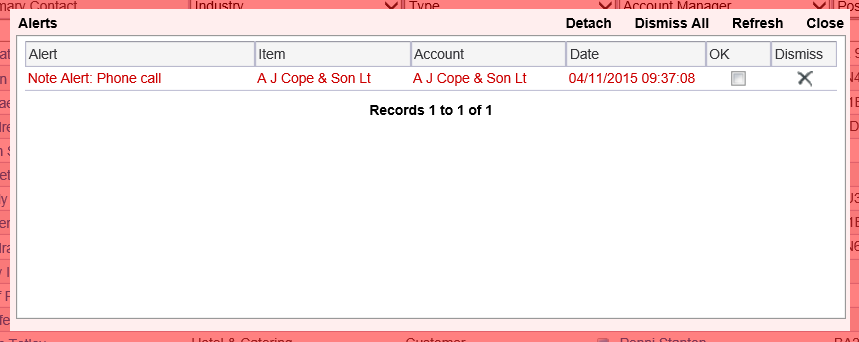
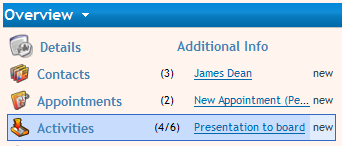
Recent Events

From the Account Overview Screen you can see the 4 most Recent Events for that Account. To view the last 50 most recent events:


gif7

Categories

In addition to user defined fields unlimited numbers of Categories may be added to items - these are centrally managed in the Administration Console to ensure that the data is consistent, although they can also synchronise with Outlook items as well if the same terminology is used.

Typical applications may be where an organisation has many service lines that may be applied to, say, an Opportunity.

Adding a Category to a Gold-Vision Item

The Category field may be on the Details or user defined page of an item.

gif8

! Categories can also be recorded against: Contacts, Activities, Appointment, Opportunities, Quotes, Profiles, Projects, Events, Campaigns and Emails.

Post Code Look-up

Postcode look-ups can be set-up as an automated link from your Gold-Vision system utilising the PCA Predict service which is updated every day from Royal Mail's Postcode Address File (PAF®). This is an optional Gold-Vision add-on which assists users when adding new Accounts and Contacts and is offered with flexible payment options.

Please visit PCA Predict website for more information.

How to use Post Code Look-up

postcode

Appointments

If you have enabled Calendar Synchronisation, Appointments can be created from Gold-Vision, allowing you to use all the facilities of inviting colleagues and contacts, checking for available time and setting reminders.

Appointments can be created from the following Gold-Vision records: Account, Contact, Activity, Opportunity and Project. However a parent record is no longer a requirement for an Appointment.


Creating a New Appointment from an Account

Open the record that you would like the Appointment to be associated with, select New Appointment

appointment

Start & End Dates

The start and end date can be edited as normal date fields in Gold-Vision. Both dates must be supplied when creating an appointment.

When the start date is changed the end date will automatically change such that the difference between the two dates remains. The end date can be manually modified to edit the gap between start and end date.

Default Start and End Dates

When creating a new appointment the start date will default to the nearest next half-hour. The end date is defaulted to be exactly one hour after the start date.

Start and End Validation

If an end date is selected that is before the start date then it will automatically revert to one hour after the start date. If the end date is cleared completely then it will default to be one hour after the start date on save.

Schedule View Auto-Scroll

When changing the start or end dates the schedule view will automatically scroll to the selected date. The start date will be displayed by default if the span between start and end date is too great to be displayed on the view together.

Reminder Option

The reminder option allows for a reminder to be specified a number of minutes, hours, days or weeks before the start date of the appointment. The selection is from a drop down list.


Gold-Vision Reminder Alert

If you select a reminder option then all users who have not declined the appointment will receive a Gold-Vision alert at the selected time before the appointment start date. Please note that these alert reminders obey the user time zone selection.

Owner - Creating Appointments for other Users

A look up user icon is available to select the Owner of an appointment. By default, the Owner is set to the current user, however, it can be changed to any other user that has granted the current user permission to Read/Edit their calendar.

Please see the Calendar Permissions section to learn more about how to change the Read/Edit permissions for a user.

Please note that the Owner cannot be changed once an appointment has been saved. The reason for this is that Gold-Vision appointments are linked to appointments created in a third party calendar.

If the Owner is changed before a new appointment is saved then the attendee list will be changed so that the new Owner replaces the existing Owner attendee.

Please note The Owner is the user who's third party mailbox/calendar the appointment will be created in.

Please note - A parent Account record is no longer a requirement for an Appointment. A parent Account can be set against an Appointment record but this is entirely optional.

The reason for this change is so that appointments can be created between internal users without the necessity to associate them with an account.

Scheduling Appointments

schedule


Each row represents an attendee and the view extends horizontally with the hours of the day.

Green/Red schedule Bars

Two vertical lines appear in the schedule view to depict the start and end date of an appointment. The green line depicts the start date and the red the end date. The schedule view automatically scrolls to the correct start and end date when the page loads. If the start or end dates are modified the schedule view will update accordingly, scrolling to the correct day and time. The green and red lines are a useful cue for where the appointment will appear in everyone's diary.

Schedule View Appointments

When attendees are added to the appointment the schedule view will automatically load their appointments for that day and overlay them on the view. This allows you to identify when a mutually free space is available in the calendar.

Please note - if Calendar Synchronisation has been enabled to Auto Add Attendees in the Admin Console, this will have the affect of automatically adding the members of the parent to the appointment as attendees. For example - the Primary Contact.

Inviting Attendees


Attendees can be invited from the Schedule button, click Edit then Details - Schedule.

Please Note: If you cannot see the Invite buttons you do not have permission to edit the attendee list of the Appointment you are currently editing.

invite

Inviting Users

Other users can be invited by clicking Invite User from the Schedule toolbar. A list of users will appear. Click on the names of the users to invite. When you click on the user their name will be greyed out and a tick will appear to the right of their name. The list of users can be filtered and paged as normal.

Inviting Teams

To invite an entire team of users to an appointment click Invite Team from the Schedule toolbar. A list of teams will appear. Click on the name of the team to invite. When you click on the team their name will be greyed out and a tick will appear to the right of the team name. All of the users from the selected team will be added to the appointment individually as attendees.

Inviting Contacts

To invite a Contact click Invite Contact from the Schedule toolbar. A list of contacts will appear, which will be filtered by the parent Account (if there is one) by default. Filter and page the list as normal and click on the name(s) of the Contact(s) to invite. When you click on their name it will grey out and a tick will appear to the right.

When inviting contacts there are two options that may appear. If the Appointment has a parent Account, Project or Opportunity then the list of contacts to choose from will be limited to related (or linked) contacts. You can expand the search to all contacts by clicking the "All Contacts" button.

Required vs Optional Attendees

The required/optional status of an attendee can be controlled after adding them to the invite list. A drop down will appear next to each attendee's name with Required and Optional as options. Required is the default option. Change the setting accordingly per attendee.

Removing Attendees

Attendees can be removed whilst in Edit Mode by clicking the red cross the the left of the attendees's name. Changes do not take effect until Save is clicked.

Accepting Appointments

Accept, Decline & Maybe

If you are an attendee of an appointment and not the owner/organiser then you have the option of accepting, declining or tentatively accepting it from within Gold-Vision.

Gold-Vision automatically recognises if the current user is an attendee of an appointment and displays a set of acceptance buttons to them accordingly. The buttons appear on the right hand side of the lower, navigation menu against the appointment item.

Regardless of whether you accept an appointment from within Gold-Vision or within a third party calendar the attendance data will be kept in sync.

Pending Appointments

Appointments which you have not accepted will appear in your Pending Appointments list

Editing Appointments

Appointment editability follows the normal Gold-Vision security rules. You can limit editing by team using the Access Options and you can limit field-level editability via the screen design security.

Editing Attendees

Click Edit, Schedule.

Only certain users can modify attendees.

Attendees can be added using the Invite User or Team as well as Invite Contact
Click the Red Cross to delete an attendee
The status can be changed to Optional from the dropdown
This view will display other appointments already in the calendar allowing for scheduling and removing conflicts
For new appointments the user creating the item has full control over the attendee list.
System Administrators can always modify the attendees of existing appointments
The Organiser can modify the attendee list of existing appointments
Any user with Read/Edit permissions to the Organiser's calendar can modify attendees
Any other users cannot make changes to the attendee list.

Appointment records

From the Appointment record you can:

Create a new Activity/Note or Opportunity

If you are the Owner of the Appointment (or a System Administrator) you can also:

Re-Assign to another Account

Report - run a report to show start/end dates, location, subject, attendees, notes and activities

Make the Appointment a Favorite

Cancel - this will delete the Appointment from Gold-Vision and from your third party Calendar

Remove from Gold-Vision - the Appointment will remain in your third party Calendar


Calendar Permissions

Calendar permissions must be set by the user and can be configured from under the User Settings screen, which can be found under the Home menu or by clicking on the user's name in the bottom left corner of the screen.


From the Calendar Permissions screen users can grant access to others to allow them to create/edit appointments on their behalf.


Create/Edit Permissions


Create/edit permissions can be granted by selecting a user from the drop down, checking the Create or edit Appointments box and clicking the Save button to the right. By granting a user Create/Edit permission you are allowing them to create appointments on your behalf and also be able to edit the attendee list (see below).


Read My Private Appointments


By checking the Read My Private Appointments box and clicking the Save you are granting a user to be able to see the details (namely Subject and Location) of any Private Appointments in your calendar.

Links

Clear uses for this are the linking of Accounts that are in a “Group”, or where a Contact may be an employee of one Company, but they are working as a consultant on a project for a different company.

You want to reflect these links and Gold-Vision can provide the answer.

Examples of Links

- Accounts may be linked to other Accounts and you can select the type of relationship that is in place with different linked organisations.

- A Contact may be linked to a project/account/opportunity/activity with a role – these linked contacts are included for e-mailing from that item.

- Contacts external to an Account can be linked to the Account eg. Consultant

- A product may be linked to supplier accounts – e.g. preferred supplier, secondary supplier etc…

- Quotes may be linked to Accounts / Projects where they may relate to the same end-customer.

Creating Links

Open the Account that you would like the Link to be associated with, click on the Account button in the top left hand corner. Select New Link OR: Click "new" next to Links on the Account Overview Screen

Select the item type that you would like to link to the Account, select the Relationship then click Create Link

link


Email Tracking


Where a Contact has an email address, emails to and from this Contact will be tracked into Gold-Vision.  By adding a domain against an Account, email to and from other people at the organisation will also track into Gold-Vision where no contact exists.  Note: Only company domains should be added (not gmail.com etc.).

Email domains are entered on the Account Details screen:

email_domain

! More than one email domain can be added for an Account by separating with a comma as shown above.

Open the Account Overview page that you would like to view emails for and click Emails on the Account Overview screen:

image2

Excluding Email Tracking for Confidentiality Reasons

- For adhoc emails you may set the email to “Confidential” using the Outlook message options. Gold-Vision will respect this and not track.

- Please note this is a default setting which can be amended by your Gold-Vision Administrator.

- Contacts or domains may be specifically excluded from email tracking. The exclusions will be set up by your Gold-Vision Administrator.

- Some Clients wish to set up internal colleagues as Contacts. Gold-Vision will automatically disable mail tracking on internal domains – naturally except for e-mails from or to legitimate Contacts!

Sending an Email

From the Account Record click on envelope icon to the right of the Primary Contact name:

image1

An Outlook email will then be opened ready to send to your recipient.

Manually Adding Email

Emails sent or received from Contacts belonging to a Gold-Vision Account will automatically be tracked and held under the email history for that Account. Email Tracking will take place provided a valid email address is held against the Contact Record.

It is also possible to manually add an email that has not been tracked by Gold-Vision, for example in the situation where an email was received from a new Contact before their details have been set up under the relevant Account Record or if an incorrect email has been set against a Contact.

Alternatively, you can use Gold-Vision's Outlook Plug-in to also manually add emails from Outlook into Gold-Vision. Details on installing an using the Outlook Plug-in can be found here.

Private Emails

Setting a Tracked Email to Private (this functionality is set by user by your Administrator)

- You can make an email “private” from the Gold-Vision email message record, by selecting Make Private. The Private Box will be checked.

- It will now only be visible from Gold-Vision by the user, unless another Gold-Vision user has been copied in.

- In the same way you can also make an email public that has been set to private, the “private” box will be un-checked and the tracked email will then be visible to other Gold-Vision users.

- Emails can be private by default for a selected user or users – this will be set-up by your system Administrator.

You can set an email to Private or Public from within the tracked email in Gold-Vision:

private_emails

Searching Emails

From the main Gold-Vision menu, click on Tools and select Search from the list.

Option 2: from within an Account or Contact Record. This type of search is for items specifically related to that item or account. You can also search for Emails from within an individual Account or Contact record.

view_emails

Using Email Records

From the Email screen you can complete some of the following items for that record:

Reply/Reply to All/Forward: reply to all recipients in the email including CC and BCC.

New Link: link the email to an item in Gold-Vision.

Re-Assign: re-assign the email to a different Contact or Account.

Make Private: users can make emails that they have received “private”. Other users will not be able to view these emails but they will still be available for the individual user to view from the relevant Account or Contact record. The private check box will be ticked for emails that have been made private in this way.

Make Public: Click to change a private email to public which will then be viewable by all users.

use_emails

Click on Body to use the Email Navigation Menu and view information held under the items associated with the Email.

body_emails

Outlook Add-in

Gold-Vision Outlook Add-In
Release Date – October 2013 Compatibility Office 2010; Office 2013

Note: We aim to offer customers the best and most stable Outlook integration possible. This is why from March 2017, the Outlook 2007 plug-in is no longer supported.

1.  Downloading

To download the Outlook Add-In, go to  www.gold-vision.com/office/2013/setup.exe

You can then Save and Run or just Open the installation program.

2.  Installation

When prompted by the Installation program click the Install button.

This will download and install the Add-In, returning the following message once complete.

3.  Setup in Outlook

When you next start Outlook, you will see an additional Gold-Vision tab in the ribbon (right-hand side).


4.  Add-In Settings

Click the Settings button.

  • You can also test the connection from this screen.
  • If you use a Gold-Vision server on your domain, you should not need to specify credentials, but if you are using a hosted Gold-Vision setup or your connection to Gold-Vision is through and external address, you may need to specify your logon details (including domain name).
  • The proxy settings allow you to set a proxy address if needed to connect to the Gold-Vision server.
  • If you have changed the Global Names of objects on your system, you can use the Update Labels from Gold-Vision button to bring these details back through to the Add-In.
  • You can also select whether you are prompted when an email is successfully linked from Outlook via the Add-In.

Once correctly configured, the button on the Add-In in the ribbon will be unlocked.

5.  Using the Add-In

The Gold-Vision Add-In tab is available on both the main Outlook ribbon (when looking at Emails or Contacts/People) and within individual email messages. To add a message Gold-Vision, select it within the Inbox (or other folder) or open the item, then click Add Message to Gold-Vision.

Notes


Creating Notes for an Account Record


Notes can be created against an Account or against any item within the Account. Notes are used to record important Account related information. To create a new Note against an Account record:

gif_notes1


OR: Click new next to the Notes link on the Account Overview Screen:

imagenotes

OR: From a list menu, click on the short cut menu and select New Note:

gif_notes2


Note Options

Reminder Date - Using the calendar icon select a reminder date and time – the Note Creator (user) will then receive an Account Alert at the corresponding time.

Broadcast the Note by Email - If you would like to Broadcast the Note to others in your organisation select the relevant tick box and Save.

Note Alert Reminder - To create a Note Reminder for yourself (optional). Click on the Calendar icon:

imagenotes

The Note creator will then receive an Account Alert at the corresponding time.

As well as being created from an Account, new Notes can also be created directly against the following Account items in exactly the same way: Contacts, Activities, Opportunities, Quotes, Profiles and Projects.

Sticky Notes

A Note can be checked as a Sticky Note. A Sticky Note will always be at the top of the list of notes, and will appear in red.

gif_notes3

! If you no longer wish the Note to remain as a Sticky Note you can Edit your Notes to uncheck the Sticky Note box.

Broadcasting Notes

Broadcasting a note as an Email and/or Alert allows you to share information with Gold-Vision users. The process works as follows:

gif_notes4

Members - all members that have been added to the item includes users and teams.

Item Owner- the owner of the item e.g. Activity owner will be added as the recipient to the broadcast email note.

On Save the Note will be emailed to selected users plus an Alert will be received on their Gold-Vision system if this option was ticked.

OR: If the Send Email option was un-ticked but Raise Alert was ticked then the Alert will be received by selected users on their Gold-Vision system.

Note Alert Reminders

If a Note Reminder date (and time) was entered when the Note was created then an Alert will open at the corresponding time for the user that created the Note. An alert pops-up in the middle of your Gold-Vision screen in a red box:

noteimage_1

You can click:

- Detach: enables you to move the Alerts window around your screen.

- Refresh: will bring in any new Alerts that have reached their due date/time.

- Close: will close the Alerts window but if you have not acknowledged an Alert then the window will re-open after a set period to act as a further reminder for action to be taken.

Searching for Notes

There are two main options for searching notes:

Option 1: from the main Gold-Vision menu. Click on Tools > select Search Notes > this will display all the notes in Gold-Vision in a list view.

Option 2: from within an Account or Contact Record.

Viewing Notes

Click on Notes from the Account Overview screen. A list of Notes added to the Gold-Vision Account Record will be opened. Sticky Notes will always be at the top of the list and highlighted in red. Click on the Note name to open the Note.

Notes can be viewed by:

Local Notes – Notes created at the Account level.

All Notes – Notes created at the Account level plus other Notes created under other Gold-Vision areas.

Power Search options can be used to filter the Notes list:
- enter the exact name or description.
- enter * or % followed by the search target.

Viewing Notice Board Notes

A Note can be checked so that is appears on your organisation Gold-Vision Notice Board.

gif_notes6

! To remove from the Notice Board, un-check the tick box.

Notice Board Notes can be viewed from the main Gold-Vision menu: Click Home and then Notice Board.

Notice Boards can also be added to your personal Gold-Vision Homepage and Notice Board Notes can also be viewed from the Gold-Vision tools menu.

Editing Notes

Editing options are set by your Gold-Vision Administrator utilising one of the following methods:

1) Notes are set to be un-editable for audit trail purposes.
2) Full editing is available by the Note creator.
3) Editing can be made on the day of input by the Note creator to allow corrections such as spelling mistakes to be made whilst preserving main audit trail.

Activities

Activities can be used to store details on past or future actions related to Accounts such as arranging meetings, making phone calls or recording issues.

Activities can also be used to record tasks that relate to a specific Contact, Opportunity, Project, or Campaign. This allows relevant information on each of these items to be recorded separately within an Account, as well as allowing the different types of Activity to be listed separately. Activities can then easily be retrieved, viewed and edited as required.


Creating Activities

Open the Account that you would like the Activity to be associated with.

gif_act1

OR: Click "new" next to the Activities link on the Account Overview Screen. This will always create an Account Activity by default.

imageactive

A new blank Activity screen is then opened for you to complete. Some of the key fields that you may be required to complete are:

Due Date/Start Date- Select using Calendar Icon – if not entered will default to current date & time.

Status - Select progress stage from dropdown menu – if not entered will default to “Not Started.”

Due Date Alert Tick box option – will create an Alert for the Activity owner which will appear on their Gold-Vision system when the due date/ time is reached.

Outlook/Synchronise Tick box option – the Activity will be synchronized with an Outlook Task for the Activity Owner and an Outlook reminder will be received when the Activity date/ time is reached.

Owner - Your main Gold-Vision User who will complete the Activity. If you do not assign an Owner, the Activity creator will automatically be assigned to the Activity.

Fields that cannot be edited are updated automatically once the Activity is saved.
Any fields that are red are mandatory and need to be completed prior to the Activity being saved.

! Activities can also be created directly from within a saved Opportunity, Contact and Project. These Activities will be linked directly to the item they were created from and can be accessed from within that item.

Creating Activity Alerts

By ticking the ‘Due Date Alert’ box this will create an Alert for the Activity for the Owner, based on the Activity Due Date/Time.

imageactive1

If the Alert has not been completed by the Due Date/Time you will get an Alert on the screen.

Synchronise Gold-Vision Activities in Outlook

When creating an Activity there is the option to synchronise it with an Outlook task for the Activity Owner and an Outlook Reminder will be received when the Activity time/date is reached. From the Activity Record tick the Outlook Box:

imageactive2

Changes to the synchronised Outlook Task, for example adding Notes, or Gold-Vision Activity will be updated in both systems when the mail sync. process next runs (usually every 5-10 mins.)

Using Activity Records

From the Activity screen you can:

Edit the information to update data such as Activity due date or completion status.

Use pre-designed Word/html document templates to send a letter or an email to the Contact for the Activity with pre-defined company details completed.

Email the Contact.

Clicking on Activity in the Activity Function Menu gives you the option to create some of the following new items:

New Note - may be added. A Note set up for an Activity is then visible from this Activity screen.

New Link - may be created to link the Activity to another Gold-Vision item.

New Appointment - may be created in Outlook to link to the Activity.

Add Member - to assign a User or Group from within your organisation to a specific role for this Activity.

Follow-up Activity - can be created from an Activity of any sort. This can be used, for example, after a meeting with an Account customer, to define a new action following the first Activity, perhaps to prepare a Quote or set up a demonstration.

Re-Assign the Activity to a new parent item e.g. reassign an Opportunity Activity to a new parent Opportunity.

Synchronise and Unsynchronise - allow Gold-Vision Activities to be viewed in Outlook, as Tasks.

Adding a Member to an Activity

You can add individual members or teams from your organisation to an Activity plus you have the option to allocate a specific role to this individual or team.

Open the Activity Record that you would like to add a Member and from the Activity Function Menu select Add Member.

gif_act3

! From here you can also select the required Member role (optional).

Viewing Members and Adding Members

You can view Members stored against an Activity Record. From the Activity Navigation Menu select Members:

gif_act4

! New Members may also be added by clicking the Add button or delete by clicking X

Viewing All Gold-Vision Activity Records

You can view all Activities created from your Gold-Vision main page. Click on View and Select Activities OR Click on the Activities icon.

You can use Power Searching options and select required column headings to filter the Activities List.

You can select from the following tab options:

imageactive3

To open an Activity Record click on the Activity summary. You can also open other Gold-Vision items direct from this screen, such as an Account and Contact.

Profiles

Profiles are a method of creating lists of Contacts or Accounts that are unrelated in other ways. Profiles also hold User-Defined data, and can be a great way of holding more detailed information about the particular Account or Contact. Unlimited numbers of Profiles can be added to an Account or Contact.


Creating a New Profile

Open the Account that you would like the Profile to be associated with, click on the Account button in the top left hand corner.

gif_profile1


OR: Click "new" next to the Profiles link on the Account Overview Screen:

profileimage

Gold-Vision will open a blank Profile screen to be completed. Save your entries by clicking the Save button in the top right-hand corner of the Profile screen.

Using Profile Records

From the Profile screen you can complete some of the following key items:

- Use pre-designed Word/html document templates to send or email a letter to the Profile Contact with pre-defined company details completed.

- Email the Contact

- Click on Account Name to open Account Home Page.

- Click on Contact to open Contact page.


Click on Profile to use the Profile Function Menu and create New Items:

New Notes may be added: A Note set up for a Profile is then visible from the Note screen.

New Links may be created to link the Profile to another Gold-Vision item which will then be visible from this Profile screen.

Add this Profile to your Favorite List: It will then be automatically displayed on your personal favorites list.

Re-assign a Profile to another Account: Select an Account that already exists on your Gold-Vision system that you would like the Contact to be re-assigned to – by entering the Account name or by scrolling through the Account list. The Account Record will now be updated to show the Account that the Profile is assigned to.

gif_profile2

Click on Details (from within the Profile) to use the Profile Navigation Menu and view information held under the items associated with the Profile:

gif_profile5

Viewing Profiles

Viewing Profiles for an Account

From an Account Overview, click on Profiles from the Account Overview screen:

gif_profile3

Viewing All Gold-Vision Profile Records

You can also view all Profiles created from your Gold-Vision main page. A List of Profiles created in your Gold-Vision system will be displayed: